

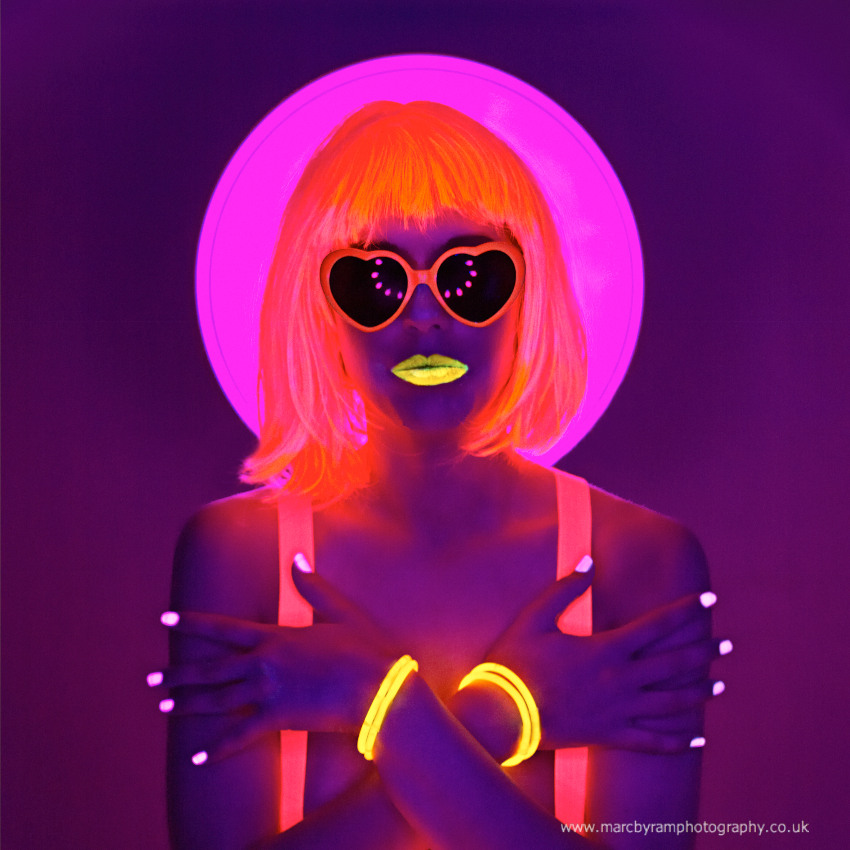
This subject area of photography has had many visits, over the years, since I first did a blog article on UV back in 2012. So I thought it was time to update things a little here.
Ultra Violet (UV) or “black light” is one source of lighting that falls outside the conventional lighting spectrum for photography, the other one often used is Infra Red (IR) which will be the subject of future blog. Since my first experimentations with UV, I have done a number of projects and photographic workshops, and from this I have been able help other photographers with some recommendation that they can follow.
The thing to remember about UV light is that this light source itself isn’t actually visible to the human, being a shorter wave length than we can see, that is why it is sometimes referred to as “Black Light”. Instead what happens is that human eye sees the illumination or more accurately the florencence of objects that are reactive to UV light. There is I am sure a much more detailed explanation of this on the internet if you want to know the exact chemistry, but for the purpose of simplicity items that react with UV are usually either bright neon colours or illumines (glow in the dark).
When planning a photoshoot with this lighting in mind I think it is worth testing each of the items that you plan to use, as not only do some items appear brighter that others, they can also appear a very different colour to the one you will see in day light. So the next thing you will need to consider is your UV light source there is some larger equipment available like large strip lights and a UV Cannon used for discos, night clubs etc. Most of my work has been with smaller UV bulbs but in large numbers to get enough power out to illuminate a large part of my studio. A UV Cannon will put out a lot of UV light but aren’t very controllable but never less good if you have a large space to light or multiple subjects.
I personally think a good place to start is with a couple of low energy UV bulbs and see this lighting effect for yourselves as I first did here in a dark studio:

If you are anything like myself, you will want to get a better idea of how items can come together for your shoot a mannequin is very useful for all aspects of photography and no more so than here adorned with neon wig and sun glasses :

In this above test shot you will see behind the mannequin I have used a continuous lighting unit with the daylight bulbs swapped out for UV bulbs, and this appears to be a reasonable light source although one is certainly not enough so the front light source for this test shot was my “beauty board ” again with a bulb exchange from daylight to UV as shown here:
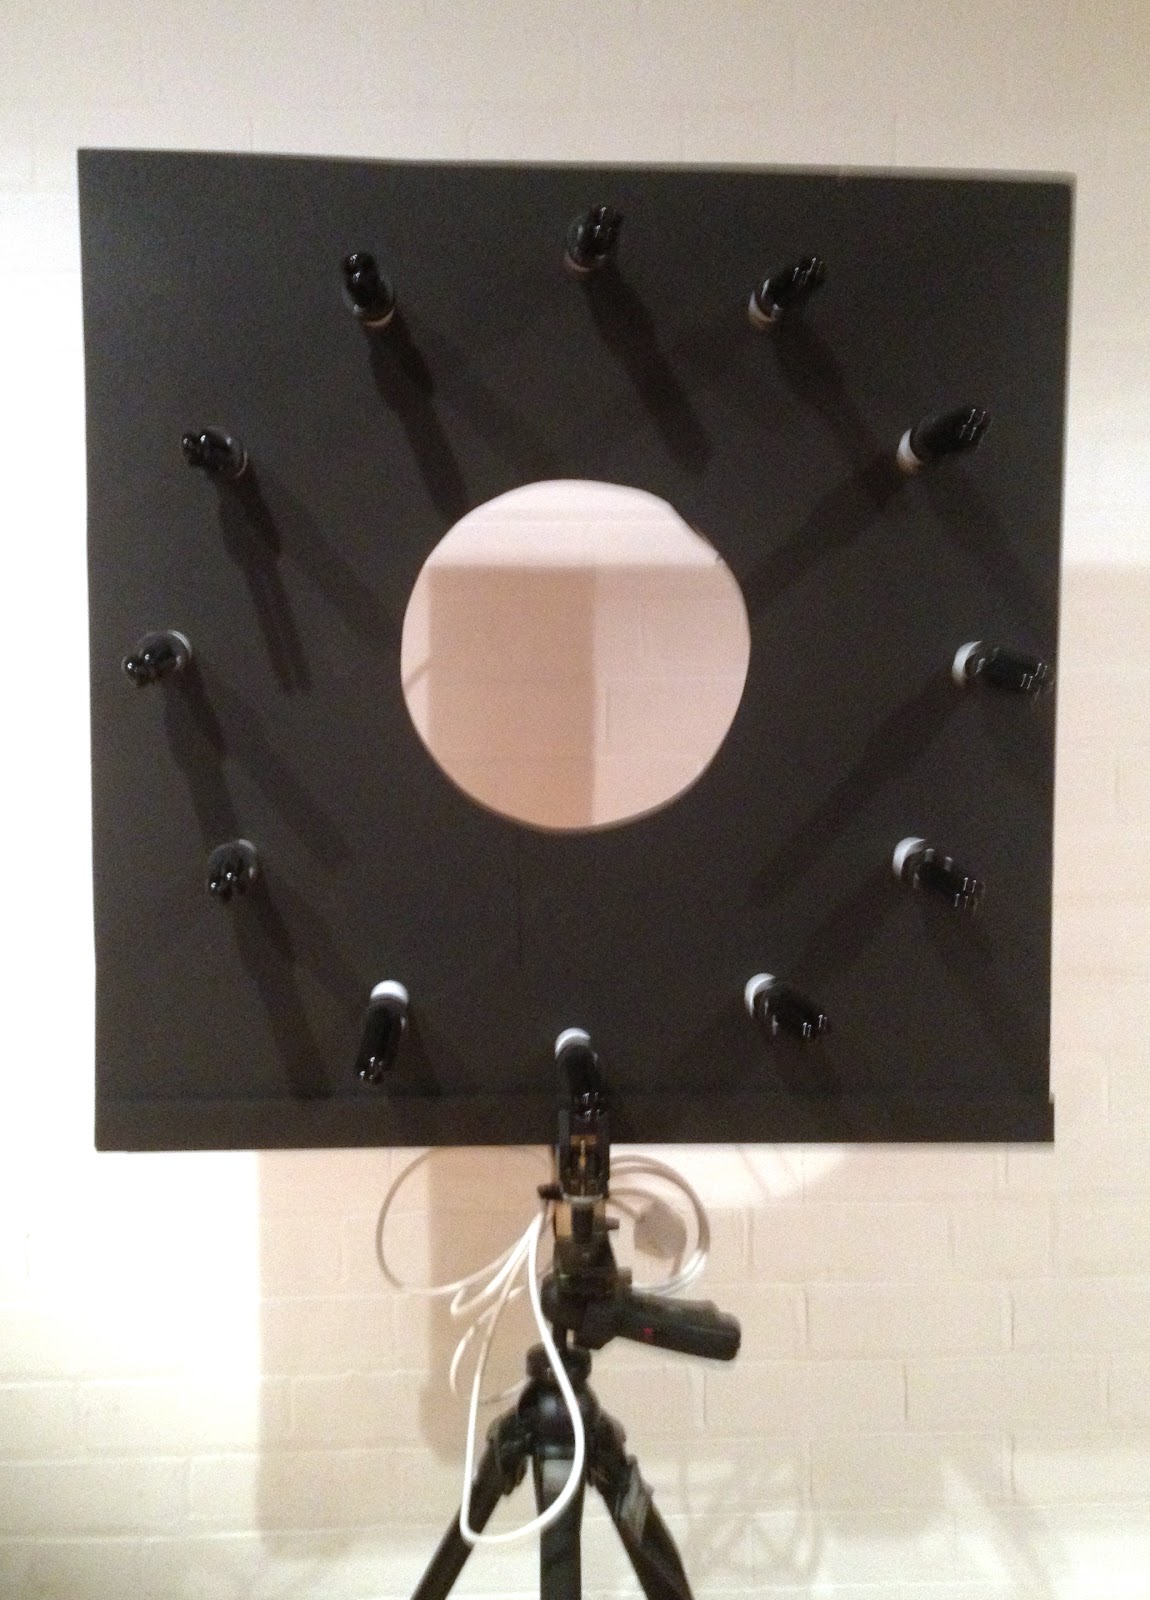
As you can see there are 12 bulbs in the board and a further 6 in the dish and this probably still isn’t enough for a studio shoot, but I do think it is a very good set-up and in my case utilizes existing equipment very well.
This is also going to be one of those shoots where you need to consider your camera equipment as it may well be that expensive cameras and lens aren’t the best for this work. For instance the test shot above were taken on a iPhone which is free of expensive glass lenses and filters and therefore captures the UV a lot better than some more expensive dedicated photographic equipment.
All my images (below) are shot with a now rather antique Hasselblad H1 with a Phase One digital back at 400 ISO and certainly give me greater quality as you would expect over the iPhone, but so far anything shot for example with a Canon DSRL has been very disappointing.and this would appear to be an issue with the lens more than the camera. The important thing is to remove any UV filter you may have on your lens to protect them. But even with these removed there appears to be further UV coating within the lenses themselves suggesting that older or less expensive lenses would be more useful for this type of work.
Below are some images from my UV shoot with my model Mickey (Anders) that I think will inspire you to to give this a go for yourselves:


All these images had help with many aspects including make up and styling from a Make Up Artist (MAU) and I would strongly recommend working with not only a good MUA who understands your vision, but also a model capable of holding a pose for what will be longer shutter speeds than you would normal have with a conventional studio set up.
All the above shots where taken at F2.8 – 3.5 with a slow shutter speed of between 1/25 – 1/6 sec at ISO 400 or in the case of the bubbles (UV Bubble solution) ISO 800 to get enough shutter speed to capture the bubbles.
For students doing projects with this media I recommend you to work with other creatives for a really fun collaboration where you can experiment with fabrics, make up and so much more. This type of project will really come together with as many variation as possible, so it is best to go with a very loose ideas of what you want to create, and see how things work out tweaking as you go to reach your end goal.
A couple of key points to remember is that if you are working with a model/models their hair, eyes and mouth will not show up on their own with UV lighting, hence I used wigs, glasses and UV lipstick to ensure facial charaterists were maintained.
Here are some workshop images to inspire you to have a go yourself:
This one was unusually against a white background rather than the usual black and used UV paint splattered onto the subject along with glow sticks to light the eyes:

These images are against a black background and use both luminus props and UV reflective clothing.


Add a bit of sparkle …….

You can mix UV lighting along with some light painting … so endless possibilities …..

So have some creative fun …half of the excitement of UV photography is never quite knowing what you will get intill you try it out …and with the information on this blog you certainly have enough knowledge to give it a try …

You might also like


